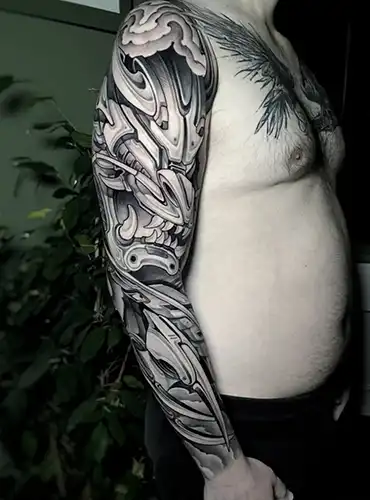
Biomechanical Tattoos in Nairobi, Kenya
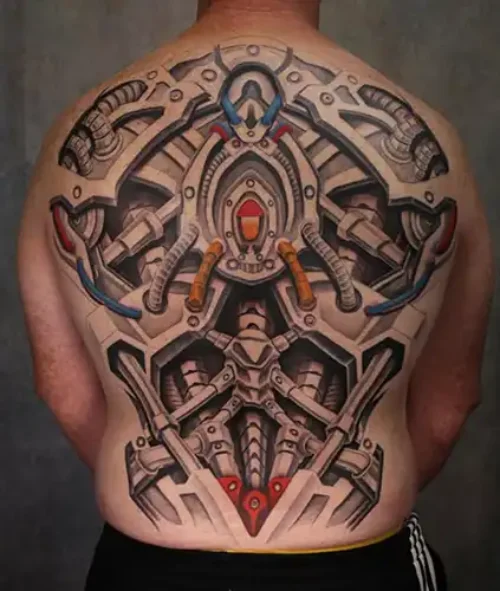
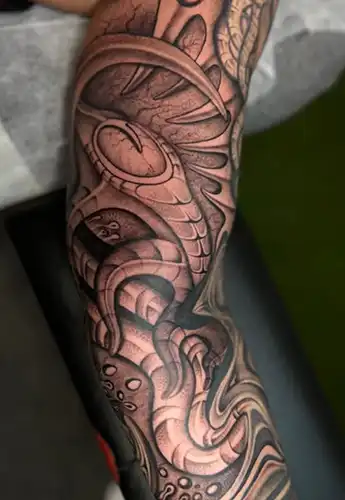
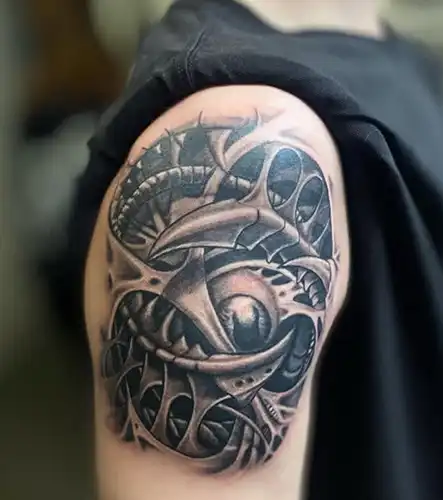
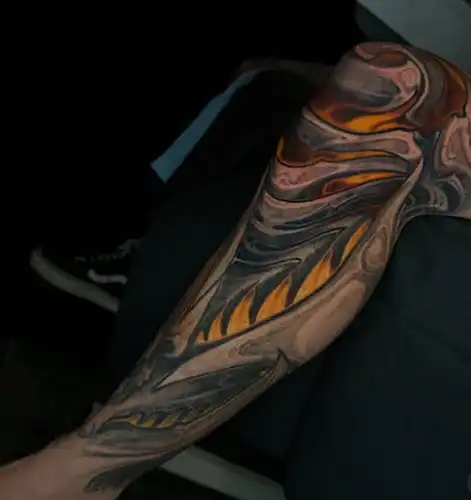
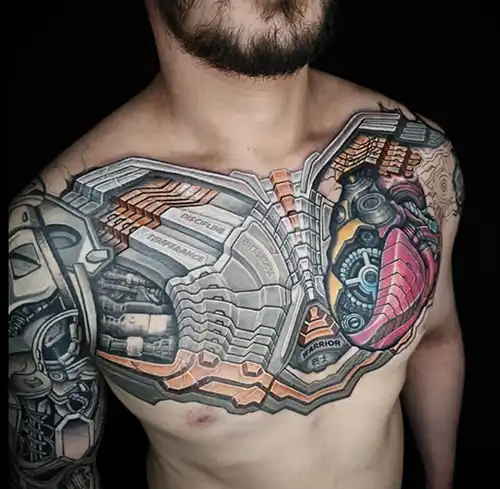
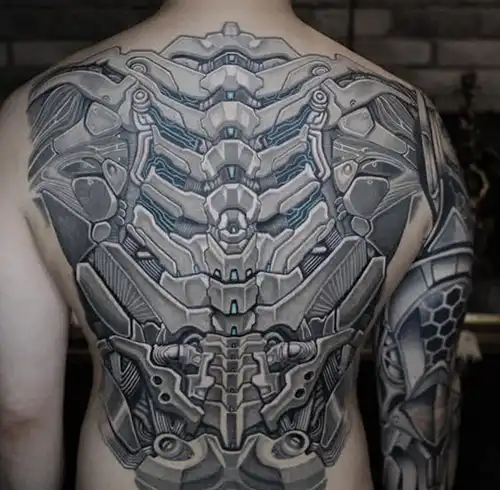
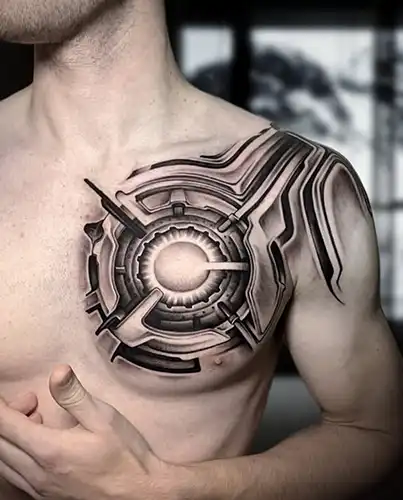
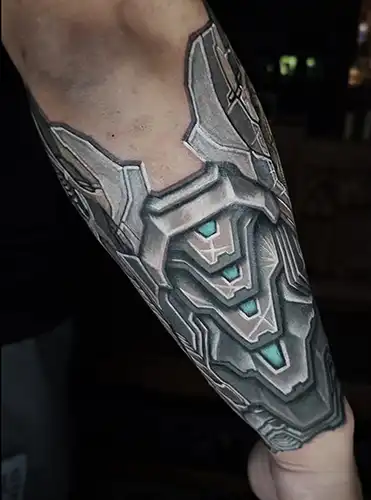
Biomechanical tattoos are a fascinating and highly detailed form of body art inspired by the integration of mechanical and organic elements. These tattoos often depict a fusion of human anatomy with machinery, creating a visually striking and surreal effect. Here’s a detailed overview:
Biomechanical Tattoos
Key Features of Biomechanical Tattoos:
- Fusion of Organic and Mechanical Elements:
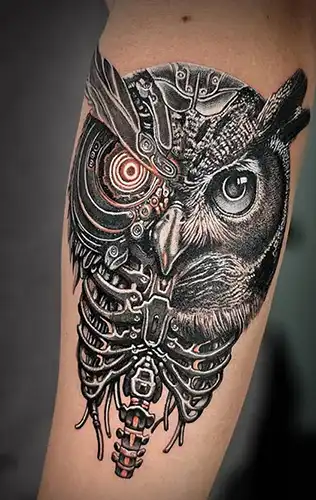
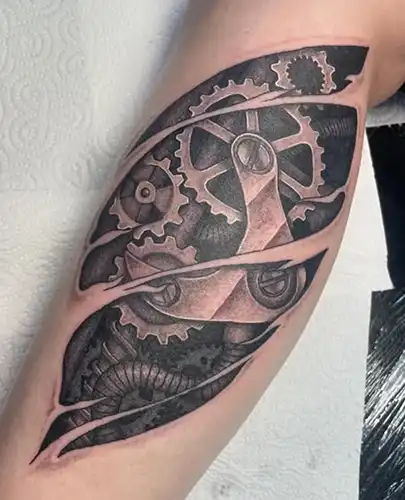
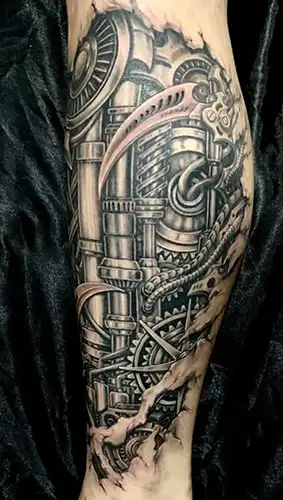
– These tattoos depict a seamless blend of human anatomy with machinery, such as gears, pistons, wires, and robotic parts.
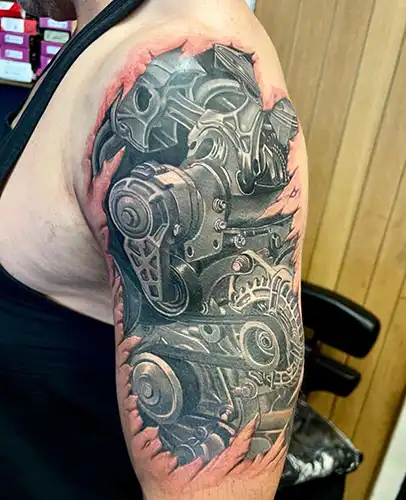
– Designs often give the illusion of mechanical components underneath torn skin or integrated with bones and muscles. - Three-Dimensional and Realistic Appearance:
– Biomechanical tattoos rely heavily on 3D effects, shading, and highlights to create a lifelike and immersive look.
– Depth and detail are critical, often mimicking light reflection on metallic surfaces or the texture of flesh. - Dark and Metallic Color Palette:
– Typically rendered in monochromatic shades like black, gray, and metallic silver for a gritty, industrial feel.
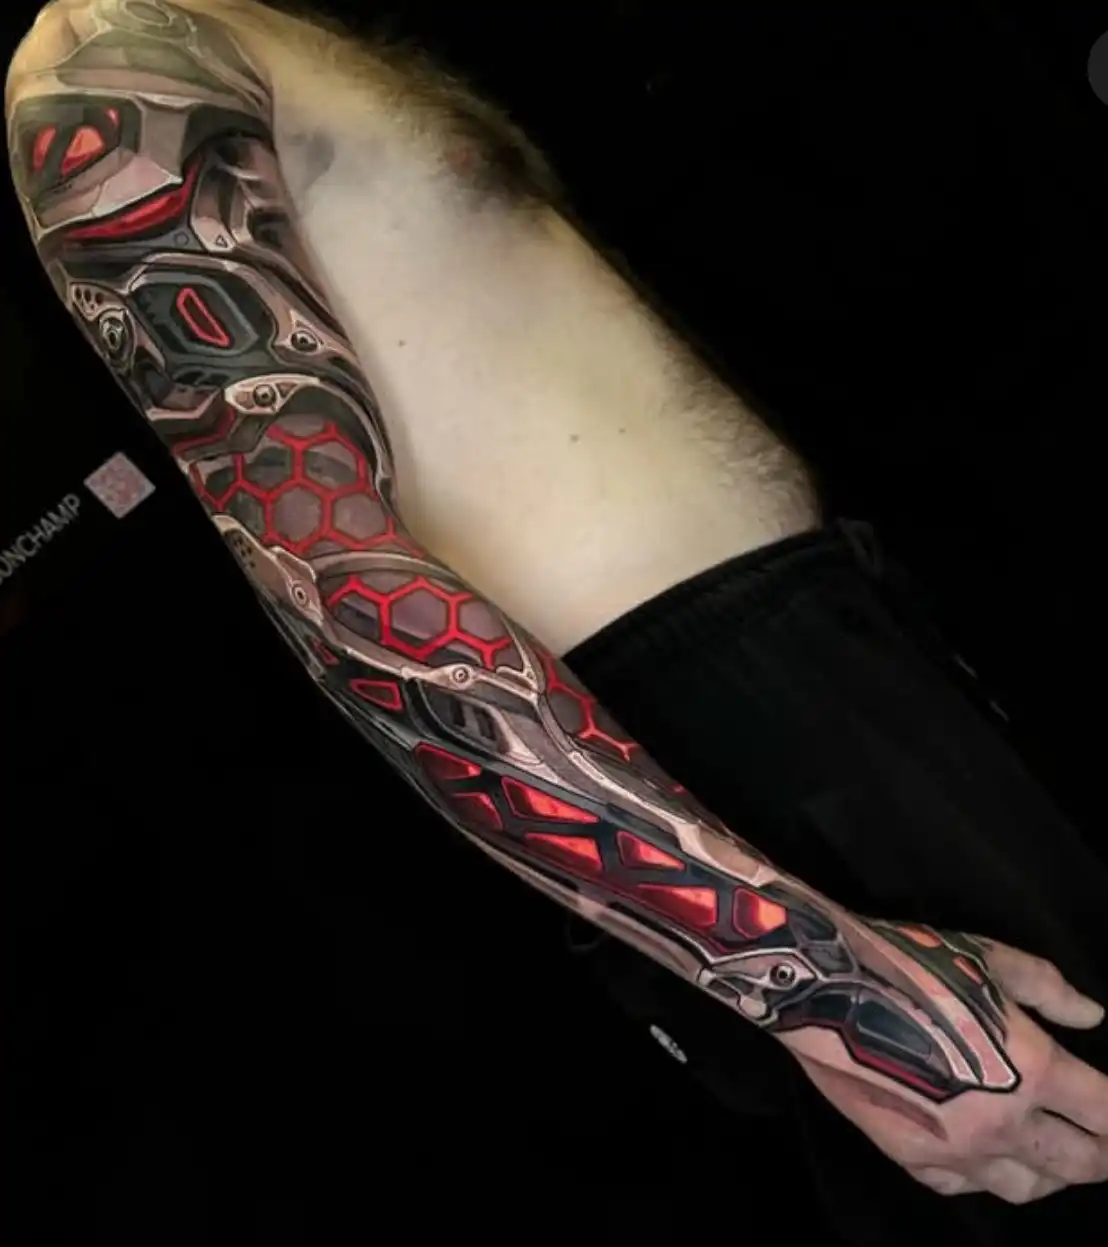
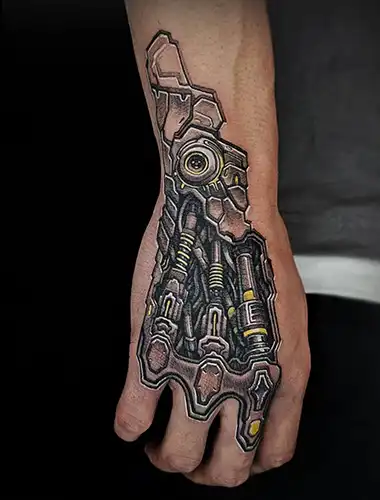
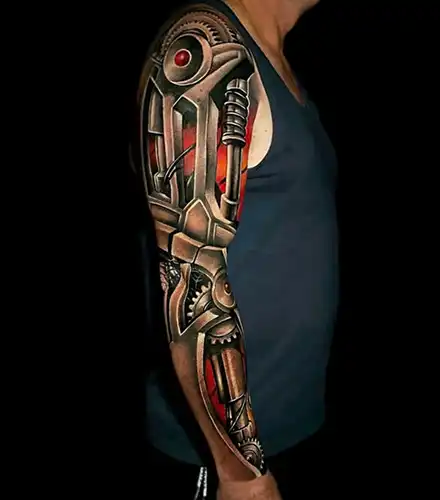
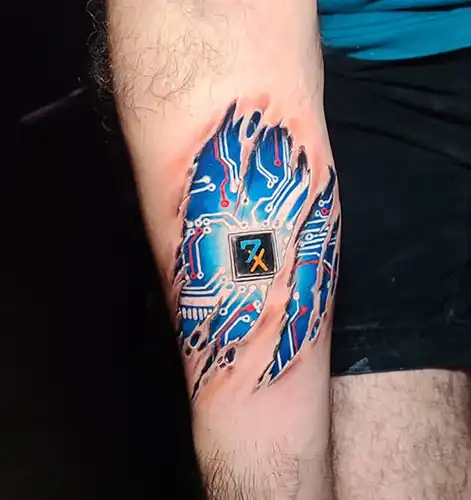
– Some designs incorporate pops of color, like glowing neon (blue, red, or green) for added intensity. - Highly Intricate Detailing:
– Every element, from gears to screws and veins, is meticulously detailed to achieve hyper-realism.
– Requires a skilled tattoo artist proficient in fine lines and complex shading techniques. - Dynamic Flow with Body Anatomy:
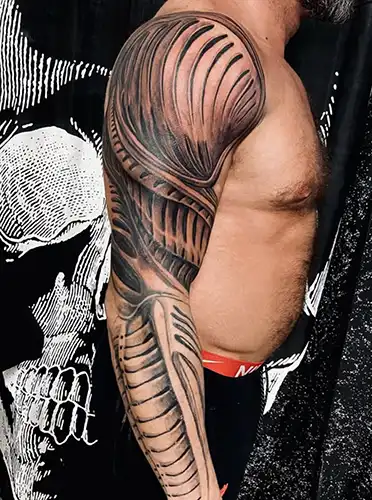
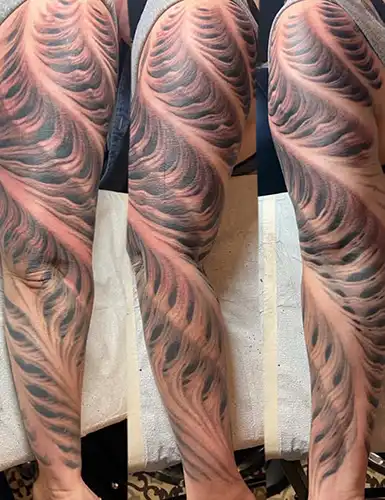
– Designs are tailored to the natural curves and structure of the body, enhancing the illusion of mechanics being part of the individual.
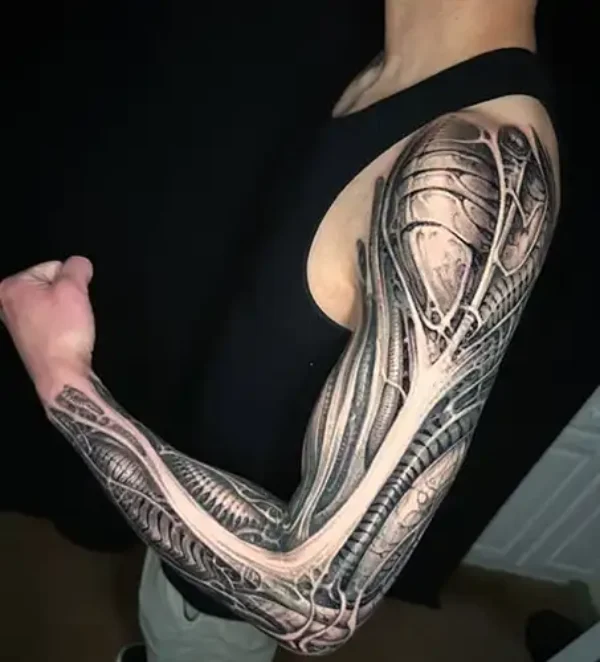
– Common placement areas include arms, shoulders, chest, back, and legs, where larger spaces allow for elaborate designs. - Sci-Fi and Futuristic Inspiration: Influences often come from science fiction movies (Alien, The Terminator), futuristic concepts, and biomechanical art by creators like H.R. Giger.
- Customization:
– Each tattoo is unique, often crafted to reflect the wearer’s personality or a story.
– Artists collaborate with clients to design pieces that harmonize with their body shape and individual vision.
Design Style Techniques for Biomechanical Tattoos
Creating biomechanical tattoos requires a combination of artistic vision, technical skill, and an understanding of anatomy and mechanics. Below are the key techniques that define the biomechanical tattoo design style:
Realism and Hyper-Realism
- Objective: To create a lifelike and immersive appearance.
- Techniques:
– Use meticulous shading to mimic depth and texture (e.g., metallic shine, soft flesh).
– Add highlights for a reflective effect, particularly on metallic surfaces.
– Integrate anatomical accuracy, ensuring the mechanical components align naturally with muscles, bones, or joints.
3D Effects and Trompe-l’œil
- Objective: To achieve a three-dimensional look, giving the illusion of depth and layers.
- Techniques:
– Incorporate torn skin effects to expose mechanical elements beneath.
– Use heavy contrasts between light and shadow for a realistic “pop-out” effect.
– Place shadows strategically to simulate the parts sitting below the skin.
Integration of Organic and Mechanical Elements
- Objective: To seamlessly blend human anatomy with mechanical components.
- Techniques:
– Incorporate veins, muscles, and bones intertwined with wires, pistons, and gears.
– Blend soft, rounded shapes (organic) with sharp, angular lines (mechanical).
– Use smooth transitions to avoid abrupt separations between the two styles.
Use of Linework
- Objective: To define shapes and enhance details.
- Techniques:
– Employ fine linework for intricate mechanical details like bolts, screws, and wires.
– Use bolder lines for edges and major components to ensure clarity and structure.
– Pay close attention to symmetry in mechanical parts to maintain a harmonious design.
Color Palette
- Objective: To create a cohesive and striking look.
- Techniques:
– Use black, gray, and metallic shades as the primary palette for an industrial feel.
– Incorporate bright neon colors (e.g., red, blue, green) for glowing effects or futuristic accents.
– Blend colors smoothly to avoid harsh transitions, especially between light and dark areas.
Dynamic Flow
- Objective: To make the tattoo interact naturally with the body’s shape and movement.
- Techniques:
– Tailor designs to follow the contours of muscles, joints, and curves.
– Position key mechanical components (e.g., joints, hinges) to align with real body movements.
– Create a sense of motion by angling gears, wires, or pistons in dynamic directions.
Texture Detailing
- Objective: To enhance the realism of different surfaces.
- Techniques:
– Use fine stippling or dotwork for rust, grime, or metallic textures.
– Employ smooth gradients for polished steel or soft organic skin.
– Add scratches, dents, or corrosion for a worn, industrial aesthetic.
Layering and Depth
- Objective: To give the tattoo a multi-layered look.
- Techniques:
– Stack mechanical components, creating a layered effect with visible overlaps.
– Use shading and highlights to differentiate layers, simulating transparency or gaps.
– Incorporate anatomical elements (bones, tendons) as background layers to enhance depth.
Sci-Fi and Artistic Influences
- Objective: To add a futuristic and surreal touch.
- Techniques:
– Draw inspiration from H.R. Giger’s artwork or sci-fi franchises.
– Integrate surreal shapes and patterns, giving the design a unique, otherworldly quality.
– Use asymmetry or abstract forms for a more artistic, less mechanical look.
Customization and Storytelling
- Objective: To make each tattoo unique and meaningful to the wearer.
- Techniques:
– Collaborate with our client to incorporate personal elements, such as initials, favorite symbols, or specific machinery.
– Design components to reflect our client’s personality or life story, like gears symbolizing resilience or wires representing connectivity.
Schedule Appointment
Biomechanical Tattoos FAQs
The Process of Getting a Biomechanical Tattoo
Biomechanical tattoos are intricate and require careful planning and execution to achieve their signature realistic and surreal look. Here’s a step-by-step breakdown of the process:
Conceptualization and Consultation
- Client Consultation:
– Discuss our client’s vision, including preferred design elements (e.g., gears, pistons, wires).
– Identify personal touches, like integrating specific machinery, symbols, or anatomical features.
– Determine placement based on the body’s contours and natural flow. - Design Drafting:
– Our artist sketches a custom design tailored to our client’s body shape and preferences.
– Adjustments are made during the consultation to refine the concept. - Inspirational References: Use sources like H.R. Giger’s art, sci-fi movies, or mechanical illustrations for inspiration.
Preparation for the Tattoo
- Skin Preparation:
– Clean and shave the area to ensure a smooth surface.
– Apply a stencil of the finalized design to guide the tattooing process. - Placement Check: Confirm the stencil placement with our client, ensuring alignment with muscles, joints, and curves for a natural look.
- Gathering Supplies: We use high-quality needles, inks, and tools suited for fine details, shading, and 3D effects.
Tattooing Process
- Outlining:
– Begin with precise linework to define the design’s structure and key elements (gears, wires, torn skin edges).
– Use different needle sizes for fine details and bold outlines. - Shading and Depth Creation:
– Apply shading to create depth, focusing on shadows and highlights for a 3D effect.
– Use smooth gradients to transition between dark and light areas. - Texture and Detail Work:
– Add textures like metallic finishes, worn surfaces, or organic skin tones.
– Focus on intricate details like bolts, screws, or muscle fibers. - Layering and Integration: Blend mechanical elements seamlessly with organic anatomy, ensuring the tattoo flows naturally with the body.
- Coloring (if applicable): Add metallic hues, glowing neon accents, or soft flesh tones for realism and vibrancy.
Aftercare Instructions
- Immediate Care:
– Clean the tattoo gently with lukewarm water and a mild antibacterial soap.
– Apply a thin layer of healing ointment and cover with a protective bandage. - Ongoing Care:
– Avoid direct sunlight, swimming, and heavy sweating during the healing period (2–4 weeks).
– Moisturize regularly with a tattoo-safe lotion to prevent drying or scabbing. - Long-Term Maintenance:
– Protect the tattoo with sunscreen to prevent fading, especially in exposed areas.
– Schedule touch-ups if fine details fade over time.
Follow-Up
- Client Feedback:
– After the tattoo heals, we review the design with our client to ensure satisfaction.
– Address any areas requiring minor touch-ups. - Portfolio Addition:
– With our client permission, we photograph the finished tattoo for our portfolio or social media.
– Showcase the design with close-ups of the intricate details and full views of the tattoo’s placement.
Customization and Personalization in Biomechanical Tattoos
Biomechanical tattoos are inherently unique, as they combine mechanical and organic elements tailored to the client’s body and story. Customization is essential to make the design meaningful and ensure it aligns with the client’s individuality. Below are the key aspects of customizing and personalizing biomechanical tattoos:
- Tailoring to Body Anatomy
– Body Placement:
→ Designs are adapted to fit and enhance specific body parts, such as arms, legs, chest, or back.
→ For example, hinges or gears can be placed near joints like elbows or knees to simulate movement.
– Flow and Contours:
→ Tattoos are designed to follow the natural curves and musculature of the body, creating a harmonious look.
→ This enhances the illusion of the mechanical elements being “embedded” in the skin. - Client-Inspired Design Elements
– Incorporating Personal Symbols: Add meaningful elements, such as initials, dates, or symbolic components (e.g., a clock for time or resilience).
– Favorite Machines or Sci-Fi Inspirations:
→ Include design features inspired by the client’s favorite sci-fi movies, books, or machines.
→ Examples: A robotic arm resembling The Terminator or alien-inspired organic-mechanical forms. - Choice of Style and Theme
– Realism vs. Abstract: Some clients may prefer hyper-realistic designs, while others may opt for a more surreal or abstract interpretation.
– Color vs. Monochrome: We discuss whether our client wants a classic monochrome look or vibrant pops of color (e.g., glowing neon or rust tones).
– Rustic vs. Futuristic Aesthetic: Designs can reflect a polished, futuristic look or a gritty, worn industrial style with scratches and corrosion. - Narrative and Symbolism
– Telling a Story: The tattoo can represent a journey or personal transformation, such as overcoming challenges (symbolized by repaired gears or reinforced parts).
– Organic-Machine Balance: The proportion of mechanical vs. organic elements can reflect the client’s personality or values (e.g., more mechanical for a tech enthusiast, more organic for someone valuing nature). - Dynamic Features
– Interactive Effects: Place elements like gears or hinges near movable joints to create the illusion of motion when the body moves.
– Layering: Use layering techniques to show depth, with visible “underlying” mechanics beneath torn skin or muscle. - Placement-Specific Customization
– Arm and Leg Designs: Utilize the cylindrical shape to create wrap-around designs, like pipes and wiring coiling around the limb.
– Chest and Back Designs: Use the broad surface for intricate and large-scale designs, such as a full biomechanical skeleton or an engine-inspired core.
– Hand and Neck Designs: Smaller, detailed tattoos can emphasize subtle integration, like exposed wiring on fingers or robotic tendons on the neck. - Collaborative Design Process
– Sketch and Feedback: Involve the client in the design process, showing preliminary sketches and making adjustments based on their input.
– Multiple Perspectives: Provide views of how the tattoo will look from different angles, especially for wrap-around designs. - Unique Texture and Patterns
– Personal Preferences: Some clients may prefer smooth, polished textures, while others might opt for rough, industrial finishes.
– Pattern Variations: Include organic patterns like muscle fibers or veins to contrast with mechanical textures such as gears, bolts, or plates. - Integration of Other Styles
– Fusion with Other Themes: Blend biomechanical elements with other tattoo styles like tribal, geometric, or watercolor to create a hybrid design.
– Cultural Influences: Incorporate cultural or traditional motifs into the biomechanical framework for a unique twist. - Final Touches and Placement Optimization
– Lighting and Perspective: Ensure the design looks dynamic and lifelike from all angles, considering how light and shadow will appear.
– Size and Proportion: Adjust the scale of intricate details to match the tattoo’s size and placement area, ensuring clarity and impact.
Why Customization Matters
- It ensures the tattoo reflects the client’s identity, making it a truly one-of-a-kind piece.
- Personalized designs are more meaningful and satisfying to the wearer, enhancing their connection to the tattoo.
Longevity and Aftercare for Biomechanical Tattoos
Biomechanical tattoos, with their intricate details and 3D effects, require special attention to maintain their sharpness and vibrancy over time. Proper aftercare and long-term maintenance are essential to ensure the tattoo’s longevity.
Factors Influencing Tattoo Longevity
- Tattoo Design and Placement
– Design Details: Fine lines and intricate shading are prone to fading if not properly maintained.
– Placement: Tattoos on areas with frequent friction (e.g., hands, feet) or sun exposure (e.g., shoulders, arms) tend to fade faster. - Skin Type and Healing:
– Oily Skin: Can impact how the tattoo sets, potentially causing blurred details.
– Healing Process: Improper aftercare during healing can lead to patchy or uneven areas.
Immediate Aftercare (Healing Phase)
- Day 1:
– Gently clean the tattoo with lukewarm water and mild antibacterial soap.
– Pat dry with a clean paper towel (avoid rubbing).
– Apply a thin layer of tattoo aftercare ointment (recommended by your artist).
– Cover with a breathable bandage or wrap for the first 24 hours. - Days 2–14:
– Clean the tattoo twice daily and keep it moisturized with a tattoo-safe lotion.
– Avoid picking or scratching scabs to prevent damage to the design.
– Protect the tattoo from direct sunlight, excessive sweating, and water (e.g., swimming). - Signs of Proper Healing:
– Slight peeling and itchiness are normal; avoid scratching.
– A healed tattoo will feel smooth and show vibrant details.
Long-Term Aftercare
- Sun Protection:
– Why: UV rays can break down pigments, causing fading and discoloration.
– How:
→ Apply sunscreen with SPF 30+ to exposed tattoos whenever outdoors.
→ Cover the tattoo with clothing if prolonged sun exposure is expected. - Moisturization:
– Why: Dry skin can dull the tattoo’s appearance.
– How: Use unscented, tattoo-friendly moisturizers regularly to keep the skin hydrated. - Avoid Friction: Minimize rubbing from tight clothing or accessories to prevent wear on the tattoo.
- Healthy Lifestyle: Drink plenty of water and maintain a balanced diet to keep your skin healthy, which helps preserve tattoo vibrancy.
Regular Maintenance
- Touch-Ups:
– Why: Fine details like shading, lines, and highlights may fade over time.
– When: Touch-ups are usually recommended every 3–5 years, depending on fading. - Exfoliation (With Caution):
– Gently exfoliate the tattooed area occasionally to remove dead skin cells, enhancing the tattoo’s appearance.
– Avoid harsh scrubs that might damage the tattoo.
Common Issues and Solutions
- Fading of Details:
– Regular touch-ups can restore fine lines and intricate shading.
– Avoid prolonged sun exposure and friction to reduce fading. - Blurring of Lines:
– Blurring can occur if the tattoo was placed on a high-friction area or if the skin stretched significantly.
– Consider touch-ups or modifying the design to incorporate the changes gracefully. - Skin Reactions: If the skin becomes irritated or develops bumps, use soothing ointments like aloe vera or consult a dermatologist.
Enhancing Longevity for Biomechanical Tattoos
- Focus on Placement: Choose areas with less friction and minimal sun exposure, like the back or upper arm, for better durability.
- Professional Artist Selection: Work with a skilled artist who specializes in biomechanical tattoos to ensure proper depth, shading, and detail application. At Rebel Inks Tattoos, Tattoo Removal, and Body Piercings Parlour we have artists who specialize in Biomechanical themes, realism, or detailed black-and-gray work, because of the skill and precision required for these styles.
- Choose Quality Ink: High-quality ink tends to retain its vibrancy longer than low-quality alternatives.
Why Longevity Matters for Biomechanical Tattoos
Biomechanical tattoos are intricate and rely on sharp lines, deep shading, and 3D effects for their visual impact. Proper aftercare and maintenance ensure the design remains lifelike and detailed for years to come.
Factors to Consider When Getting a Biomechanical Tattoo
Biomechanical tattoos are intricate and highly personalized, requiring thoughtful planning. Here are the key factors to consider before committing to this unique tattoo style:
- Artist Expertise
– Specialization: Choose an artist experienced in biomechanical designs, as they require a mastery of shading, 3D effects, and anatomical integration.
– Portfolio Review: Check the artist’s portfolio for biomechanical tattoos to assess their skill level, creativity, and style.
– Consultation: Have an in-depth discussion with our artist to ensure they understand your vision and can execute it effectively. - Design Customization
– Personalization: Think about how the tattoo reflects your personality, story, or interests (e.g., favorite sci-fi elements or symbolic mechanical parts).
– Placement-Specific Design: Ensure the design complements the body part where it will be placed. For instance, hinges on joints or gears following muscle contours.
– Style Preferences: Decide between realistic, abstract, colorful, or monochrome designs to match your aesthetic. - Placement
– Body Contours: Biomechanical tattoos are designed to integrate with your body’s natural shape and movement.
– Visibility: Decide if you want the tattoo to be prominently visible or easily concealed for professional or personal reasons.
– Skin Type and Location: Areas with thinner skin or more friction (e.g., hands, feet) may require more frequent touch-ups. - Time Commitment
– Session Duration: Biomechanical tattoos are highly detailed and may take multiple sessions to complete.
– Healing Time: Allow sufficient time for healing between sessions and plan around your schedule. - Pain Tolerance
– Placement Sensitivity: Consider the sensitivity of the chosen area; tattoos on bony or thin-skinned areas (e.g., ribs, spine) can be more painful.
– Size and Detail: Larger and more intricate tattoos typically take longer to complete, potentially increasing discomfort. - Budget
– Cost of Detail: Due to the complexity and time required, biomechanical tattoos are typically more expensive than simpler designs.
– Touch-Ups: Factor in the cost of future touch-ups to maintain the tattoo’s clarity and vibrancy. - Long-Term Maintenance
– Longevity: Intricate designs may fade or blur over time, especially if not properly maintained.
– Aftercare Commitment: Be prepared to follow strict aftercare guidelines during the healing process and for long-term upkeep. - Inspiration and References
– Research Designs: Look at examples of biomechanical tattoos to gather ideas for elements you want to incorporate.
– Artist Input: Share your inspirations with the artist but remain open to their suggestions for improving the design. - Health and Skin Condition
– Pre-Existing Conditions: Discuss any skin conditions (e.g., eczema, psoriasis) or allergies with your artist to ensure safe tattooing.
– Skin Tone: Consider how your skin tone will affect the appearance of the design, especially with color choices. - Lifestyle and Future Changes
– Physical Changes: Consider how weight fluctuations, muscle gain, or aging might affect the tattoo’s appearance over time.
– Professional and Social Impacts: Reflect on how a visible biomechanical tattoo might be perceived in your career or social circles. - Emotional and Aesthetic Commitment
– Long-Term Appeal: Ensure you’re passionate about the style and concept, as biomechanical tattoos are bold and permanent.
– Symbolism: Choose elements that hold personal significance to make the tattoo meaningful over time. - Studio Standards
– Studio Hygiene: Ensure the studio follows strict hygiene standards and uses sterilized equipment.
Cost of Biomechanical Tattoos in Nairobi, Kenya
The cost of biomechanical tattoos can vary widely based on several factors, given their complexity and artistic requirements. Here’s a breakdown of what influences the pricing:
General Cost Range
- Small Designs: Ksh. 5,000 – Ksh. 10,000
Simple, less detailed tattoos like small gears or a section of wiring. - Medium Designs: Ksh. 30,000 –Ksh. 30,000
– Covers areas like the forearm or upper arm with moderate detail. - Large Designs: Ksh. 80,000 – Ksh. 100,000+
– Full sleeves, back pieces, or highly detailed designs covering large areas.
Factors Influencing the Cost
- Tattoo Size and Complexity
– Larger tattoos or full-body pieces naturally cost more due to the time required.
– Highly detailed designs with intricate shading and 3D effects increase the price. - Placement
– Areas requiring more effort, like joints or curved body parts, may add to the cost.
– Visible, high-detail placements (e.g., hands or neck) often involve premium pricing. - Artist Experience and Reputation
– Experienced artists specializing in biomechanical tattoos typically charge higher rates. At Rebel Inks Tattoos, Tattoo Removal, and Body Piercings Parlour we have artists who specialize in Biomechanical themes, realism, or detailed black-and-gray work, because of the skill and precision required for these styles.
– Renowned artists may have a premium hourly rate ranging from Ksh. 7,000 to Ksh. 10,000 or more. - Location of the Studio: Tattoo studios in metropolitan areas or high-demand locations usually charge more than those in smaller towns. Rebel Inks Tattoos, Tattoo Removal, and Body Piercings Parlour is located in the heart of the Central Business Disrict (CBD) in Nairobi, Kenya, and is easily accessible to both locals and foreigners in the country
- Time Required
– Biomechanical tattoos often require multiple sessions.
– The number of hours depends on the size, detail, and artist’s speed. - Custom vs. Pre-Designed Tattoos: Custom-designed tattoos tailored to your anatomy and preferences are generally more expensive.
Additional Costs to Consider
- Consultation Fees: Some of our artists’ charge a consultation fee (often credited toward the tattoo).
- Touch-Ups: At Rebel Inks Tattoos, Tattoo Removal, and Body Piercings Parlour we might offer free touch-ups within a specific time frame, but additional touch-ups later may cost Ksh. 5,000 – Ksh. 20,000.
- Aftercare Products: Budget for high-quality tattoo aftercare products like ointments and sunscreen (Ksh. 500 – Ksh. 1,000).
- Deposit: A non-refundable deposit (Ksh. 1,000 – Ksh. 2,000) is often required to secure a booking.
Tips to Manage Costs
- Set a Budget: Know your budget beforehand and discuss it with our artist during the consultation.
- Plan in Phases: For larger tattoos, consider completing them in phases over time to spread out the cost.
- Choose the Right Artist: While budget-friendly options may be tempting, prioritize skill and experience to ensure quality work.
- Avoid Bargain Hunting: Low-cost tattoos may compromise quality, leading to higher expenses for corrections or cover-ups later.
Why Quality Matters
Biomechanical tattoos are highly detailed, and mistakes or poor execution can ruin the desired 3D effect. Investing in a skilled artist ensures the tattoo is done correctly and lasts longer, reducing the need for frequent touch-ups or redesigns.
Get In Touch
For more information on the list above and any other special services,please call or come in for free consultation
Testimonials
After he pierced my industrial piercing and seeing his amazing work, I feel even more excited about getting my tattoo with him in January. I’m really looking forward to it!
I am extremely happy with my new 'Safari' tattoo from Eric at Rebel Inks! The quality of the artwork is fantastic. Eric is a true professional and an amazing artist.
The preparation and design process was thorough and collaborative. He was very patient with my specific requests, including making sure all the elements, which hold personal meaning, were perfect.
The service was friendly and highly professional from start to finish. Despite the 8-hour session, Eric was a pleasant person to spend the time with.
The aftercare guidance and follow-up have been excellent and careful, which has made the healing process easy and better than expected.
I highly recommend Eric for anyone looking for a thoughtful, talented, and caring tattoo artist.
I recommend them 💯
I would definitely recommend if you’re thinking of getting a piercing!
The staff were super friendly, explained everything clearly, and made me feel so at ease. They answered all my nervous questions (and I had many questions),
They walked me through the whole process, gave detailed aftercare instructions, and even followed up afterward to check how I was healing 🫶
Clean, professional, and full of good vibes.
Would 100% recommend . Definitely making a second trip here.
This was the second tattoo I got and I wish I could have come to Eric for my first one! He gave me really great after-care directions for the tattoo as well as a little jar of his own Vaseline-type stuff to put over my tattoo while it was healing! He even put second skin over my tattoo so that I didn’t have to worry about it for the first few days. Now THAT’S good service. My first tattoo artist didn’t do none of that lol.
After the session Eric didn’t rush me and my friend out, he chatted with us and even when he found out I was an artist too— really encouraged me to keep creating and to find a community of artists to support me. I almost cried because I’ve had such a hard time with my own art the past couple of years, it meant so much to me to have a fellow very talented artist say that to me. 🤍🤍🤍
Eric you’re amazing, don’t ever stop creating and just know you’ve impacted lives all over the world!🫶🏻 thanks so much for everything!!
From the moment I walked in, Eric was professional, welcoming, and attentive. He made sure I was comfortable throughout, provided everything I needed, and explained every step of the process. The tattooing itself was unbelievably smooth - I genuinely felt no pain compared to my previous tattoos over the last 22 years.
Eric also gave me excellent aftercare guidance and products, and thanks to that, my tattoo healed beautifully. The attention to detail, precision, and shading are absolutely stunning. This is hands-down the best tattoo I've ever had, and I will be flying back to Nairobi for any future ink.
If you want incredible art, a professional experience, and a talented artist who truly cares about his clients, Rebel Ink is the place to go!
From start to finish, the service was exceptional. The piercer was professional, knowledgeable, and made me feel completely comfortable. The cleanliness of the place was above and beyond — everything was spotless and hygienic, which really put me at ease. Highly recommend for anyone considering a piercing!
Shout out to Eric😘
We ended up changing the jewelry three times to ensure I had the best fit and avoided any signs of rejection, and he always listened to my suggestions as a client, which I really appreciated. Now, three months in, my piercing is healing beautifully, with no sign of rejection. Highly recommend for anyone who values a piercer who cares about your comfort and healing journey!
What stood out the most was the aftercare Eric checked in with me even three weeks later to see how the tattoo was healing. That kind of follow-up shows how much he truly cares about his work and his clients.
I’m very satisfied and will definitely be coming back for my next piece. Highly recommend!
The piercing wasn't as painful as I had thought and the process was quick and satisfactory. I love it!!!
The piercing is healing well thanks to the aftercare instructions and follow-up. I would highly recommend Rebel Inks
Eric also did a belly button piercing for a friend, guiding her through the process, doing the piercing and then explaining the after care to her.
The shop is on the 3rd floor, with the entrance to the stairs near an alleyway on the left. The shop is perfect size, clean, and attractive looking. The mural is pretty dope.
Thank you for the amazing service! 🔥👅✨
I got piercibgs there and the process was really good. My biggest concern was hygiene but that wasn't an issue at all, they use new needles and they sanitize them.
The service itself was also welcoming.
I was informes of everything i needed to know beforehand.
10/10 would recommend!
Eric was so calm and patient with my almost 2 year old lady. It was such a clean and hygienic process. We will definitely be back for our second rounds of piercings and maybe even another tattoo!
They assess the area before any art and advise one accordingly. They also give one post clean up process and also do a check up after the body art projects. Overall, I loved my experience and I’m hooked. 👍
Will definitely come back next time I’m in town 🙂
He listened to what I actually wanted and made sure he could fit in the time before I flew back home.
The shop is clean & private and is easy enough to find.
Eric has even checked in a couple of times since to make sure all is good.
I would totally recommend Eric! I absolutely love my Elephants!
I had a very easy healing period and always follow up from Eric to check on my progress...I would highly recommend if you are a first timer because from my experience all went very well and attention to detail
Thank you for a good job and looking forward to send all my friends your way
And all the best with the new year 2025!
From the moment I walked in, the staff was super friendly and made me feel at ease. The studio had a clean, professional atmosphere, which immediately put me at ease. My piercer was incredibly skilled and explained every step of the process, ensuring I was comfortable the entire time. The piercing was quick and practically painless, and the aftercare instructions were clear and easy to follow. I can tell they really care about the health and safety of their clients.
Overall, a fantastic experience—I highly recommend Rebel Inks and Tattoos for anyone looking to get pierced or tattooed!
They do follow up after their services
Eric's Studio isn’t just a place to get a tattoo—it’s an experience. The combination of professionalism, artistic talent, and a welcoming environment makes it a standout destination for anyone considering a tattoo.
I highly recommend Eric’s Studio to both first-timers and seasoned tattoo enthusiasts. If you’re looking for a high-quality tattoo and an enjoyable experience, this is the place to go.
I would definitely recommend their services again and again
Thank you Rebel Ink
My piercings are healing ❤️🩹 well
I would 💯 recommend
I will definitely come back for more .
Two, all the equipments he used for the piercings were new and/or sterilised.
Three, the parlour itself was very clean and was up to par with the hygiene standards.
Four, Eric provided effective aftercare instructions, making sure I knew exactly how to take care of my new piercings and he kept in touch and continues to do so, to check on the healing progress.
I highly highly highly recommend this place!!!
Would definitely recommend them to friends and go back for other piercings
Not only was the piercing process smooth, but he also provided thorough aftercare instructions, making sure I knew exactly how to take care of my new piercings. What really impressed me was that he keeps in touch to check on how the healing is progressing – a sign of true care for his clients.
The shop maintains a high standard of hygiene, and the atmosphere is welcoming and comfortable, which really added to the positive experience. I highly recommend this place to anyone looking for a professional and caring experience. I’ll definitely be coming back for any future piercings!
My appreciation for the excellent customer service I received. The follow-ups were prompt, and I truly appreciated the gentleness and professionalism throughout. Thank you!"
"Looking for professional eyebrow microshading removal? Look no further!"
The customer care is top tier 👌🏾👌🏾.
Wonderful place to get tattoos and piercings. 💯💯
Eric goes ahead to follow up on his clients progress and gives good advice each time I reach out to him.
I would recommend Reble tattoos anytime.
Good job bro we really appreciate.
Ohh and the price is very fair.
The environment was clean , procedure was sterile and the jewelry used are of the best quality.
He followed up with me during the healing process, he educated me on what I needed to do for my aftercare.
Eric is confident, skilled , experienced and the best piercer. Highly recommend Rebel inks.✨
Definitely recommend!
Great experience.
Eric definitely know what he is doing .
I got exactly what I wanted 2 tiny tats on the same finger .
He was kind and patient throughout the session.
Healing process has been good .
Aftercare services were given and regular checkups on the healing process were done.
I would 💯recommend.
Eric gave me the best reception as it was my first time there,and made me trust him all the way. I appreciate good services.
There services are also affordable not to forget 😊.
He was also invested in the aftercare and would ensure I follow the do's and don'ts in taking care of the tattoo and ensuring proper healing and maximum ink retention.
Would highly recommend Rebel Inks Tattoos.
Rebel Inks Tattoo offer the best,affordable and quality tattoo removal services.If you have unwanted ink,choose Rebel Inks Tattoo,they're the best of the best and the professionalism is a top notch.They ensure you're free from unwanted ink with their Laser Tattoo Removal Technology...
I did a Laser Tattoo Removal with them and i can attest they're the best....
Kudos Eric...
I highly recommend.
It was a generally good experience with good hygiene during the piercing process and has been a smooth healing process.... 10/10
tips. Highly recommend 👍🏽
100% recommendable.
I was particularly impressed with Eric's attention to hygiene. He thoroughly cleaned the room before I entered, sanitized all of the equipment he would be using, and changed gloves between each ear. This level of cleanliness gave me great confidence in his professionalism.
Eric's commitment to customer service did not end on the day of the piercing. He followed up with me regularly throughout the healing process to ensure that I was following the aftercare instructions and that my earlobes were healing properly.
I highly recommend Rebel Inks to anyone in Nairobi who is considering getting a piercing. Eric is a highly skilled and experienced piercer who takes great pride in his work.
So I Check all the boxes below and more:
Customer Care: ✔️
Professionalism : ✔️
Cleanliness ✔️
Price: ✔️
After care service ✔️
Thanks and good job, Eric
The place is neat and clean and the equipments he used were also fine standards. Really appreciate his following up with me on the healing 🤗
I WOULD HIGHLY RECOMMEND THEIR SERVICES to everyone. Actually what you see on their website is EXACTLY what you will get. Keep up the good work Rebel inks Tattoos.
The infection is now gone. I would definitely recommend!
Can recommend this place totally and would go back there anytime!
Thanks!
OUR LOCATION
Areas We Serve
NAIROBI
KIAMBU
KAJIADO
MACHAKOS
